Monday 24 December 2012

Christmas Wreath 2012

Here is this year's Christmas wreath made from holly and ivy from the garden, moss from the hedgerows and a few bits and pieces from the local garden centre!

At least I didn't have to make the wire frame having made one from coat hangers last year which I squirreled away until needed again for the festive season!

Happy Christmas Everyone!!

Thursday 1 November 2012

Halloween and Pumpkin Creations

It's that time of year again - the clocks have gone back and the nights draw in. It's been a Fothergill family tradition at Halloween for many years to give our 'trick or treaters' a spooky experience when they call at the door!

This year was no exception and we duly carved up a few pumpkins and a srange looking Mangle Worzle into ghoulish looking creatures waiting for darkness to fall......

 
And here they are glowing in the dark!
 
 
Our 'trick or treaters' loved them....although they were a bit spooked by the werewolf that greeted them at the door...!


Sunday 9 September 2012

Balancing Pebbles

After a long wet summer, time to take a short break and hopefully find some sunshine! Luckily our last-minute break co-incides with a week of good weather so off we go to the Norfolk coast, me, Mr F and doglett Truffle.

A few years ago we came across an artist on the beach at Lyme Regis who had perfected the art of balancing stones (quite big ones too) and then I discovered more via the internet when researching for images for one of my websites. Intrigued by the beauty and simplicity of this art form, I've been longing to have a go myself  and find out if I can create my very own pebble chimneys.

First attempt was a sort of 'Pebble Henge' and the funny thing is...you can 'feel' when the pebbles hit their balancing point and almost 'lock' together.

Here is our doglett Truffle keeping an eye on things.


So the next challenge is to see if I can build some pebble 'chimney stacks'...and here's the result:


And finally...after a couple of days I perfect my technique and get my 'photo of the week'


Such simple beauty in natural form, transient, fragile and vunerable...to be washed up and reformed by the tide in just a few hours....

Sunday 29 July 2012

Summer House Blues!

Finally summer arrives and a chance to get back out in the garden and 'Fothergills Inc' family set to work on a revamp of the garden summer house!

It was looking a bit sad and neglected and the steps in much need of repair. So the family set to work, mum, dad, Charlie & Henry. In the space of a weekend we've transformed our little summer shed into something more lovely...and all it took was a few pots of paint, a bit of wood and some plants!!!

Here's the before...


And here's the aft....


Meanwhile...more lushness in the rest of the garden and the day lilies are at their peak of perfection!


And the dog-proofing seems to have worked too!


Thursday 26 July 2012

Slug Patrol!!

It's been a wet old Summer and apart from the last week we've had endless days of relentless rain and greyness! Good for the lawn and my newly planted borders but not so good for butterflies, bees & fledgling birds. We've kept up the bird feeding regime front and back and hopefully most of the young blue tits, robins and sparrows that visited our feeders through the spring and summer have now survived into adulthood.

Meanwhile the slug and snail population has thrived during the wet weather so my young Hostas and Lupin plants are a prime target for slug and snail raids! Amazingly so far no sign of damage though....and the Hosta has gorgeous flower spikes - maybe something to do with being on a gravel base - or could it be something to do with our nocturnal visitor?


We've spotted him several evenings at dusk, trotting down the lawn and into the borders. Hedgehogs like a supply of water, so the shallow dish of water left out for our doglett also provides our resident hedgehog with a welcome drink plus he can slip under the fence into our neighbour's garden and forage for more yummy squelchy snacks!


Whatever the reason...we're lucky to have our little prickly visitor. Hedgehogs are in decline and their population has plummeted dramatically over the last 10 years. No one knows quite why but a combination of loss of habitat, pesticides, overly tidy gardens and natural predators have all contributed to the demise of this charming species.


Let's hope that our efforts to help one Hedgeyhog will bring more baby hogletts into the world!
And if you want to find out more - here's a link to the British Hedgehog Society:

http://www.britishhedgehogs.org.uk/ 

Friday 13 July 2012

Elderflower Wine

Elderflower wine has to be one of my all-time favourite country wine recipes but it's over 20 years since I made any - and it was delicious......high time to have another go!!

Elder trees are in plentiful supply around our way and just outside my back gate the trees were in full bloom just a few weeks ago. The best time to pick elderflowers is on a dry, sunny day...hmmm, not many of those this year what with it being the wettest English summer on record!! However, there have been a few 'windows of opportunity' and as a result I now have two demijohns of hooch merrily bubbling away...should be ready for bottling in a couple of months!


So here's the recipe:

1 pint of elderflowers - about a supermarket bagful of flower heads
4.5 litres of water
2 lemons
1 campden tablet
1.4kg sugar
1/3 cup of strong tea
1 sachet of wine yeast

  1. Separate the flowers from their stalks by pulling through with a fork and measure into a jug until you have a pint full of flowers - add this to a clean bowl or bucket
  2. Add the rind of 2 lemons
  3. Pour over 4.5 litres of boiling water and allow to cool
  4. Add one crushed campden tablet
  5. Cover with a clean cloth and leave to stand for 3 days - stirring daily
  6. Add sugar and juice from 2 lemons, 1/3 cup of strong tea & sachet of yeast
  7. Make sure all sugar is dissolved.
  8. Strain into a bowl and then pour into a demijohn
  9. Add an airlock and watch it bubble away for about 8 weeks
  10. Once it stops fermenting and starts to clear add a crushed campden tablet
  11. Leave for 24 hours and then syphon off into sterilized bottles


Check back in a couple of months to see how it's doing!!!!


Thursday 24 May 2012

Something Nasty in the Woodshed!!

When  you move house, you don't expect to take on other people's rubbish! We arrived at our new home last Autumn to find bags of rubbish in the front garden, the back garden home to an enourmous metal hammock, random plastic pots and old chairs, the garage full of old furniture, bits of wood, a dusty roll of old insulation and to cap it all...the front garden shed and storage areas full of old tins of paint, rusting power tools, boxes of rusting screws, ironmongery and random electric stuff....and that's just for starters!


Needless to say we had so much to do elsewhere in the house  - so sorting out the front garden shed was low on our list of priorities and in any case the winter months too cold for outdoor jobs. However a couple of weekends ago we had a dry sunny day after weeks of rain. Time to find out just what was in the woodshed!

It took most of the day sorting, sifting and cleaning....disposing of old paint is not easy these days, you can take this kind of stuff to a paint recycling centre but most of the pots were too old or not big enough quantities for that and you can't just take it to the dump if the paints are still liquid which most of these were - so we've had to book in an appointment at a specialist waste centre in Warwickshire where a chemist is on hand to identify the materials and officially sign them off!

We did find a few items of interest  amongst the mayhem though....a box of radio valves, a hydrometer, a couple of 'order of the road' badges, an old printing press and some wooden planes....I can feel a car boot sale coming on!


In the meantime, we've repainted the shed and tidied up the shelves so now it's the perfect place for potting up my fledgling plants and veggie seedlings!


Truffle and her friend like it too!

Monday 14 May 2012

Dog-Proofing the Garden!

Now don't get me wrong...I love my dog but I also love my garden too! However there are times when a conflict of interests between recently planted up flower beds and an over-enthusiastic bouncy Spaniel mean that drastic protection measures have to be taken!

Our dog Truffle's route to the back gate and walks beyond take her through the garden via her own well-trodden path. Unfortunately the route for this is via my yet to be planted up veggie plot and a small border behind the rockery. So ....mmmm what to do?

She's a bright little doggie and since she was a puppy we taught her the 'off' word. We would hold a treat in front of her and when she went to take it we would hold it firm and say 'off'' until she learnt to wait for the 'ok' command that meant she could be rewarded by taking the treat.


So - having build up the side borders in the garden with log roll, she's learnt that these are now 'off' limits and no longer ventures over them but she still treats the veggie patch as a through route. So - I still have some willow sticks and bits of hazel left over from the main fence and I reckon that if I build up a bit around my veg plot and border opposite she will learn that these are now out of bound doggie areas!!!


I've also included some pots and plants as further deterrents around the opposite border and hoping that these will be enough to convince that areas beyond are no-go!


So far so good and the new regime working well...dog looks a bit bemused though!

Tuesday 24 April 2012

Bread Making - The Easy Way!

Makes you hungry this gardening lark! Time for a bit of jam and toast - and what better than the home-made variety!

I used to own a bread making maching but it broke long ago and I never bothered to replace. I'm sure that it's a great thing if you want to prepare overnight but there is something very therapuetic about going back to basics and hand kneading the dough....and in any case you can make it quicker than the machines!


So here's my quick method:


Ingredients
1lb white bread mix (ciabatta, crusty white or any supermarket variety)
*1lb mixed grain bread mix (sunflower seed mix, wholemeal or any other similar)
10fl oz warm water
Olive Oil

*You can also use 1lb of bread flour instead but if you do - make sure to add a sachet of quick yeast and a pinch of salt. The bread mixes don't need yeast as it's already included in the mix.


Method

  1. Empty the 2 bread mixes into a bowl
  2. Add a splash of Olive Oil
  3. Now add 10fl oz of lukewarm water
  4. Mix with a wooden spoon until the dough starts to come away from the bowl - it will be quite sticky at this point.
  5. Turn out onto a floured surface
  6. Sprinkle with flour and knead for approx 2 minutes - If you've not done this before...all you have to do is fold the dough in half and then push away with the palm of your hand, repeat this several times until the dough starts to feel springy and pliable.
  7. Now put the dough back in the bowl and cover. Leave to prove for about 30 minutes
  8. After about half an hour your dough should look like this:
  9. Now bump it down again...knead it for 2 - 3 minutes and slap back in the bowl - leave for another 30 minutes!
  10. Third time around it will rise even quicker and now you are ready for the final knead and placing into bread tins. I use 1lb loaf tins lined with cake tin liners but you could also use grease-proof paper if you don't have these in your store cupboard. Bump down one last time - when you empty the dough onto your work surface it should leave the bowl in one clean blob! Knead again and divide into 2 portions and place into your 2 loaf tins. Actually - here I've also created a pizza base which I'll add some yummy toppings to once its risen for the final time (we were a bit hungry).
  11. Leave to 'prove' one last time until risen. Put your oven onto 230 C and when up to heat and  your loaves have risen - slam them in!
  12. Bake for 25 minutes...remove them from their tins and bake for a further 8 minutes or until when you tap their bottoms (excuse the phrase) they sound hollow.
  13. Turn out onto a cooling tray, cover with a tea towel and allow to cool. And here we are, deep pan pizza with yummy toppings and lovely tasty loaves. The only problem is they taste sooooooo good we've eaten our way through half the loaf and scoffed the pizza already!!!


And....if you don't eat it all at once - it freezes beautifully!

Monday 23 April 2012

Cheeky Chaffinch - Twitterpated or What??

Since I started feeding the birds in our front and back garden, we have a growing number of daily visitors to the bird table and feeders in addition to our resident population of noisy sparrows who spend their day chattering and gossiping in the hedgerows.

We're also lucky enough to have regular visits from the lovely woodpecker (greater spotted) - a splash of black & white spots and bright red under belly. I finally got to snap him on film too..it's not the best photo but at least it shows he was there!


One of our other regular visitors is the Chaffinch...normaly a shy bird who flits in and out of the table and feeders without making a big fuss. However, of late he's taken to tapping at Mr F's studio window and attacking the car!

It took a while to work out what was going on here but we concluded that during sunny days when our house windows were at their most reflective, the Chaffinch was convinced that what he saw was a rival bird invading his territory. He spent days on end attacking our house windows and the car windscreen. It drove Mr F mad who was busy trying to get on with some serious artwork...in the end Mr F resorted to hanging print outs of birds of prey on his studio door. It seemed to do the trick, except that all that happened was the Chaffinch relocated to another part of the garden - in front of my window and the whole rigmarole started again!!!!


Thankfully the demented bird has stopped it's bizarre behaviour and settled back into normal feeding. Not sure if that's because it decided the reflection was not a threat after all ....or could it be because we've had duller weather of late so the 'phantom' rival Chaffinch has temporarily gone away!!!!

Tuesday 17 April 2012

Rockery Revival

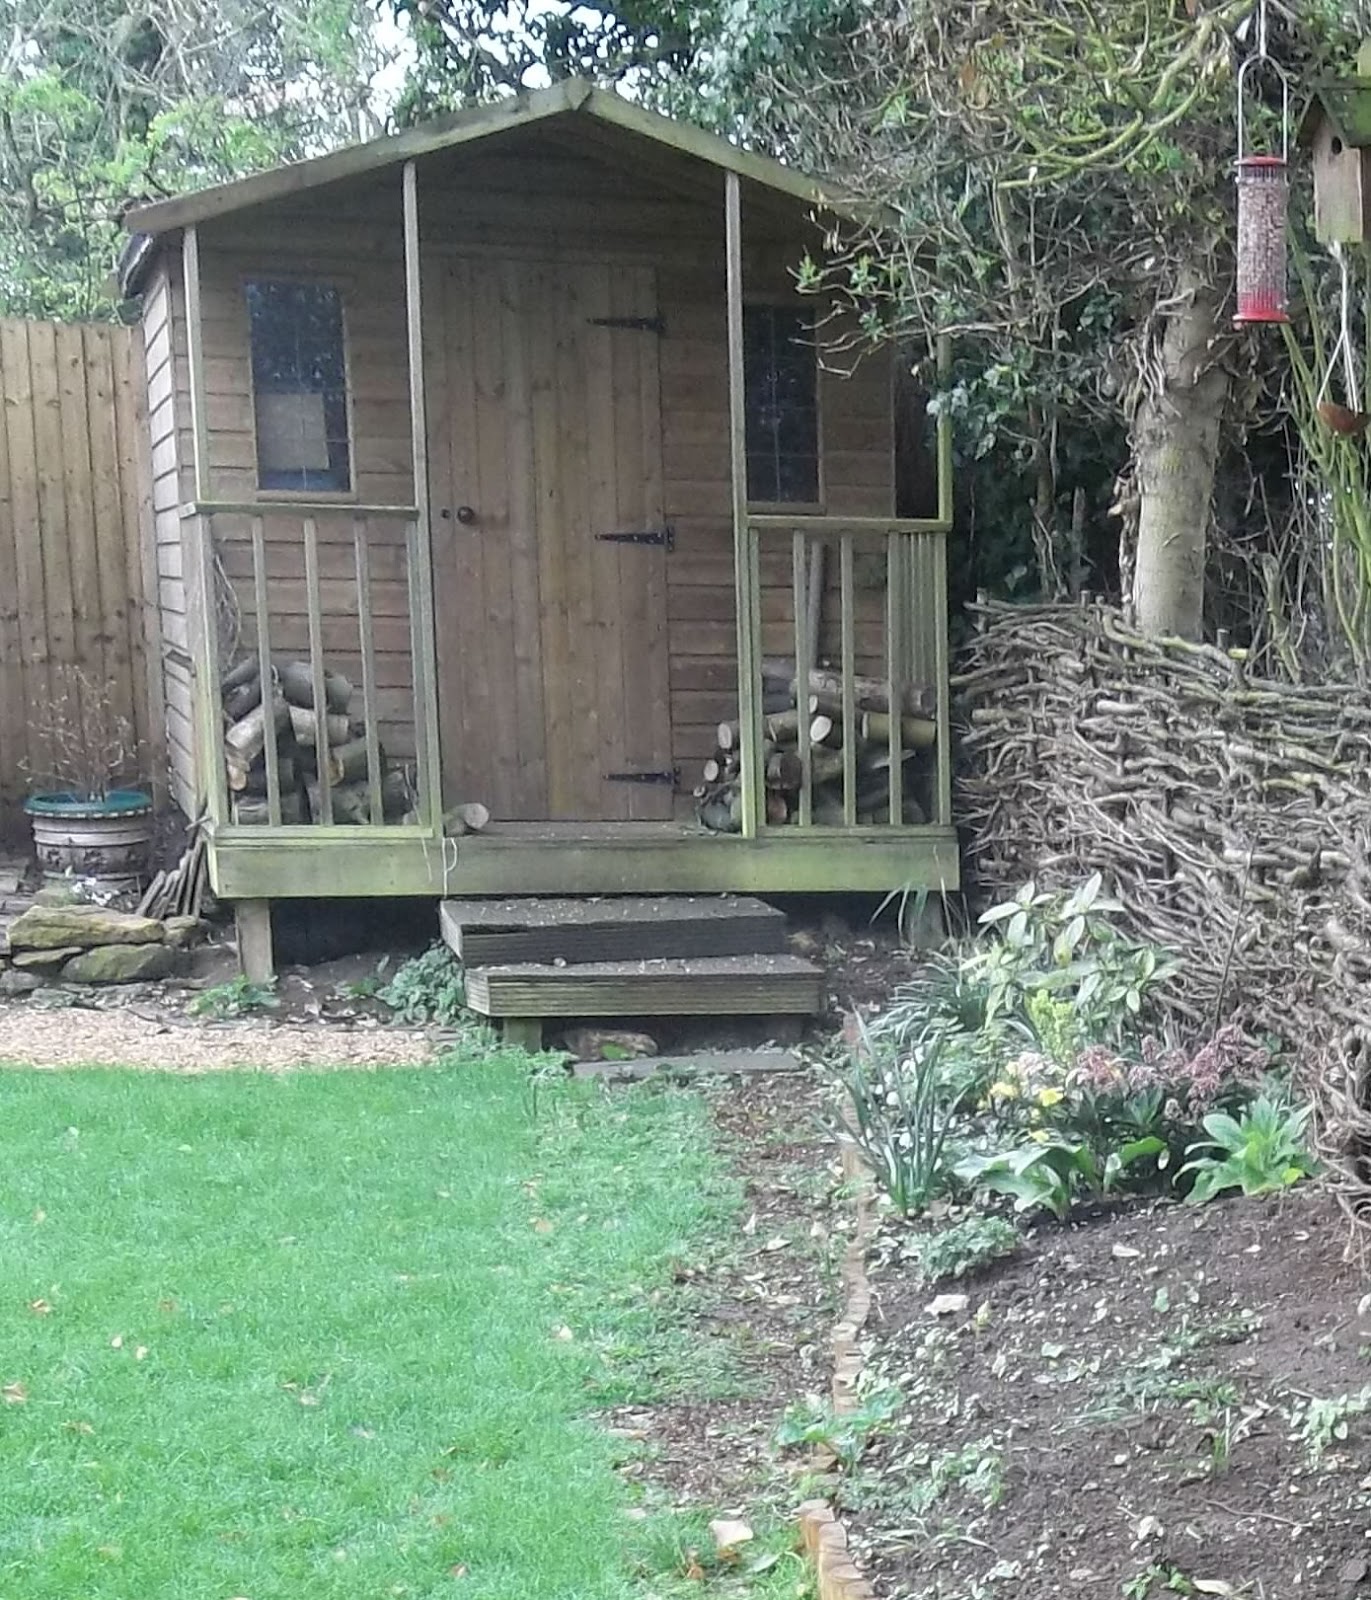
It's taken a while but I've finally got to the focal point of the garden - the rockery. Another overgrown and sadly neglected part of the garden that was crying out for some TLC.

Dominated by a wierd looking water-feature that barely worked apart from glowing in the dark when switched on via the under-lawn electricity cable!

It had to go....and unfortunately it was one of those items that we couldn't recycle...so it went to landfill in Warwickshire!

Rosemary, Thyme, Lavender, Marjoram and a hint of Mint...once apon a time it was a herb garden but now overgrown and leggy plants dominate with too many dwarf conifers competing for space.

The good news is that I managed to move a couple of the conifers to another place in the garden  - bad news is that rosemary & lavender had outgrown their welcome, so they had to go -  there is a point at which even when cut back these 'leggy' plants won't regenerate successfully...so the only solution is to dig out and start again!

Still on the recycling mission I managed to find enough Cotswold stones from the garden to rebuild the rockery and create a space for new plants. Thyme, Lavender, some Irises (which should love this sunny spot), sedums and rock roses. Lots to look forward to in the summer when they start to bloom and hopefully if we can withstand the drought, a cheerful bit of colour at the centre of the garden!

Thursday 12 April 2012

Spring Time and April Showers

It's been a long wait during the winter months but Spring is definitely here at last together with some much needed April showers! Every day the hedgerows green up a little more and the Ash tree buds are just poised to burst into leaf. I've been busy planting up the borders with a variety of perennials, Skimmia Japonica, Hellebores, Foxgloves, a climbing Japonica and a lovely little plant called erythronium pagoda.

Early days yet and lots of gaps, but it's a start!


Our Tree Peony is doing really well, and having survived the winter and our pruning now has some promising looking buds on the top branches...not long now before we find out what variety it is!


Meanwhile...in the front garden a real treat....a little Clematis Alpina growing amongst the Ceanothus - delicate sprays of gorgeous blue flowers peek through the leaves and brighten up a shady corner.


Meanwhile, the apple tree is slowly coming to life too but mother thinks this one is a biennial variety which means we may not get blossom! :( Now that  would be a real disappointment.... so I'm hoping that for once mother is wrong and that we will soon have a tree in glorious bloom. The Jury is out on this one....only time will tell!

Tuesday 27 March 2012

The Last Bit of Hard Labour

Finally coming to the end of soil sifting, slab laying and general hard labour! The last bit of the garden that needed sorting out in terms of landscaping was the bit under our kitchen window. Originaly a mess of old gravel, a few random plants, old pots and general rubbish.


How to make sense of this? Well...the soil sifting took a couple of weekends, but thanks to some serious gravel washing and relaying of slabs (more recycled ones), a little bit of help from Mr F -  plus an edging from bricks donated by a friend of mothers the area is slowly transformed into something better.


It's the shadiest part of the garden though, so finding plants that will thrive here is going to be quite a challenge but looking forward to a voyage of discovery!

Wednesday 22 February 2012

A Woven Hazel Fence.

Back in January I kept puzzling on what to do about our rather scruffy garden boundary. Having cleared some of the overgrown ivy around our resident ash tree and cut back the brambles, the challenge was to find a way of creating a good-looking fence that somehow blended in with its natural surroundings. I'm not sure where the inspiration came for this one but perhaps it had something to do with driving around the neighbourhood and  noticing beautifully laid hedgerows complete with woven toppings!

Not being an expert on the subject I did a bit of digging on the internet and concluded that perhaps a continuous woven hurdle style fence might just work, not too difficult to do once you get the hand of it were my thoughts... Hazel rods would be ideal for this - but where to find?

Back on the internet and a search for sustainable coppice woods and I find a woodland just outside Oxford. It's a lucky break - I'd tried several leads only to find that they had all sold their 2012 harvest in advance so I'm grateful to have found someone willing to sell me her entire crop for the year and able to deliver to my door!


Unfortunately snow for two weeks meant no progress but at last a break in the weather and finally I get to finish a project started just over a month ago!

It took just over 200 hazel rods, 20 odd stakes and 150 Willow rods (an afterthought) to create the fence. My first attempt was a mess, so I unpicked the lot and started again! To get a good solid fence you need to position the stakes at intervals close enough to create a strong weave but not too close so that the rods are put under too much stress and break.


Each layer builds up and although straight rods are ideal, even the more bendy ones can be interwoven in strategic places....and as ever, Truffle the doglett is always around on lookout duty!


The final cut and I add a layer of willow rods which tidy things up nicely, a quick trim of all the whispy hazel bits and levelling out of  the hazel stakes....and all finished!


It's pretty sturdy without blocking out light, blends nicely with it's surroundings and the garden birds love their new continuous perch. Just need a few plants for the border now!

Tuesday 31 January 2012

Freecycle and Recycle

January isn't the most inspiring month when it comes to gardening, grey skies, short days and cold nights - so most of the work now is maintenance and clearing. I've started building a woven fence on our garden border but more of that in a couple of weeks when my supply of hazel coppice rods arrive!!!

In the meantime I take my hat off to Oxfordshire County Council for their recycling strategy - in spite of the fact that our nearest recycling centre is in Warwickshire since the local Oxfordshire depot closed! Here we have weekly collections of plastic, metal, fabric, packaging, paper, tin and glass which means that our non-recyclable black bins are down to one bag a week.

The only problem with all this recycling lark is we have to find space for all the containers (4 black boxes for general recycling and 2 wheelie bins). Luckily we have an area in the front garden that accommodates them ....but it's all a bit of a mess. Time for a bit of a re-organise methinks but I need to find some paving slabs in order to sort it all out.

So - a quick post on our local 'freecycle' network and a plea for slabs brings a result and a nice lady from a nearby village contacts me to say she has a number of slabs looking for a new home.

Saturday morning and a few hours on Sunday shifting soil and laying up slabs and we have a result!!! Ok it's not the most inspiring part of the garden but surprisingly enough there are little nooks and crannies now where I can plant up and the whole area has given us lots more space and tidied up nicely!

Here's the before:


And here's the after:

Wednesday 11 January 2012

Cutting and Sticking

Short Winter days, long nights and the festive break mean less time for gardening but more time to catch up with family and friends. Cozy fires, time with the family, home cooking and walks in the countryside help to recharge batteries after an exhausting year.

Time to reflect on times past, remembering the highs and lows of the last 12 months, thinking of our hopes and plans for the future and looking forward to more creative and fun projects from Fothergills Inc in 2012.

But.... just a little bit of time before the end of the holiday to fit in some creativity....and what better excuse for not doing the ironing!!!

Over a year ago I bought some papier mache animals from a local stallholder. Somehow the intentions to decorate were good but I never got round to it...until now. I've always loved cutting and sticking things...creating decorative objects from cheap raw materials is very satisfying. So...on a cold winter's evening it's time to get going with the pva glue and pretty papers!!!


Materials needed:
PVA glue and some old brushes
Decorative papers - chocolate wrappers are ideal too and what better excuse for eating the contents first??
An item to decorate - papier mache animals, boxes, bins or anything you can get your hands on.

Rip the papers into small squares, coat with pva glue and start covering the object, overlapping each piece of paper as you go along and gradually building up layers of papers over the item. The chocolate wrappers add a bit of sparkle and glamour plus you have the added pleasure of eating chocs while you work!!


Keep going and eventually you will cover the whole item...or two in my case. They serve no purpose in life other than being decorative but it's been fun in the process and a great way to relax and wind down after busy times plus I'm sure we will find somewhere for them to take pride of place in the Fothergill household.


LinkWithin

Related Posts Plugin for WordPress, Blogger...