Tuesday 24 April 2012

Bread Making - The Easy Way!

Makes you hungry this gardening lark! Time for a bit of jam and toast - and what better than the home-made variety!

I used to own a bread making maching but it broke long ago and I never bothered to replace. I'm sure that it's a great thing if you want to prepare overnight but there is something very therapuetic about going back to basics and hand kneading the dough....and in any case you can make it quicker than the machines!


So here's my quick method:


Ingredients
1lb white bread mix (ciabatta, crusty white or any supermarket variety)
*1lb mixed grain bread mix (sunflower seed mix, wholemeal or any other similar)
10fl oz warm water
Olive Oil

*You can also use 1lb of bread flour instead but if you do - make sure to add a sachet of quick yeast and a pinch of salt. The bread mixes don't need yeast as it's already included in the mix.


Method

  1. Empty the 2 bread mixes into a bowl
  2. Add a splash of Olive Oil
  3. Now add 10fl oz of lukewarm water
  4. Mix with a wooden spoon until the dough starts to come away from the bowl - it will be quite sticky at this point.
  5. Turn out onto a floured surface
  6. Sprinkle with flour and knead for approx 2 minutes - If you've not done this before...all you have to do is fold the dough in half and then push away with the palm of your hand, repeat this several times until the dough starts to feel springy and pliable.
  7. Now put the dough back in the bowl and cover. Leave to prove for about 30 minutes
  8. After about half an hour your dough should look like this:
  9. Now bump it down again...knead it for 2 - 3 minutes and slap back in the bowl - leave for another 30 minutes!
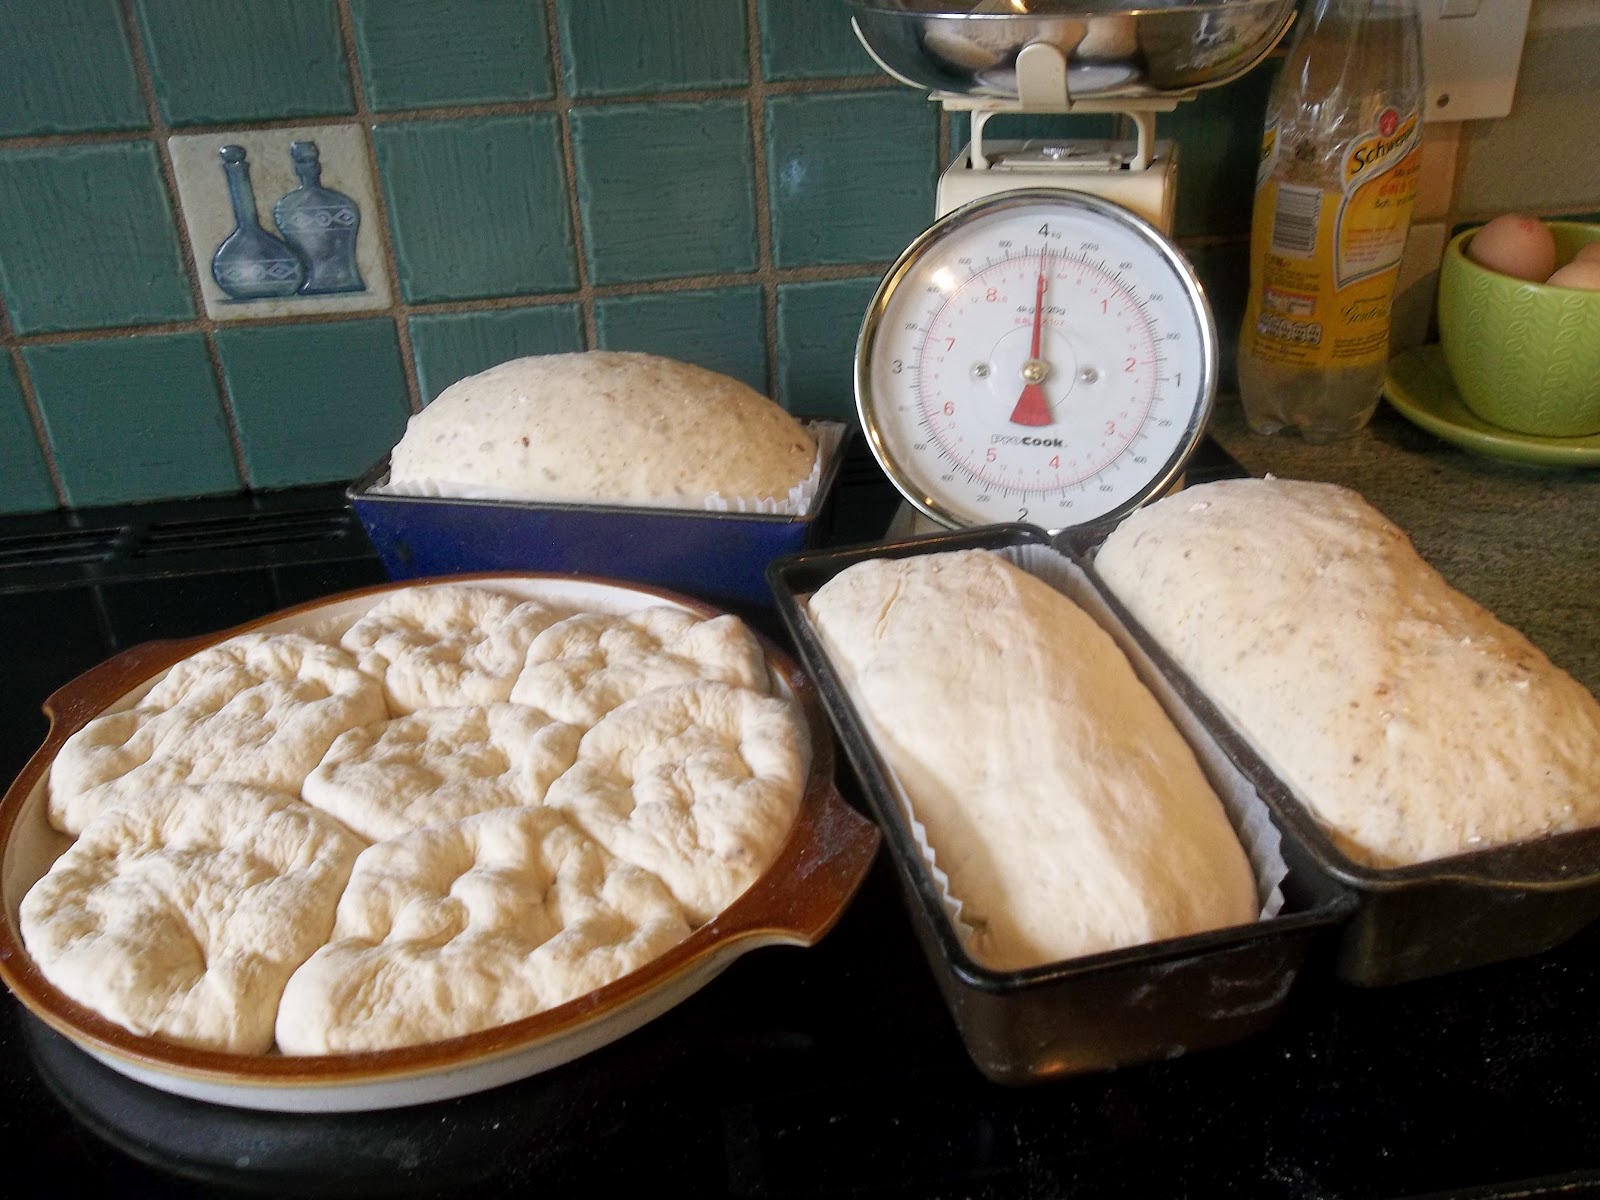
  10. Third time around it will rise even quicker and now you are ready for the final knead and placing into bread tins. I use 1lb loaf tins lined with cake tin liners but you could also use grease-proof paper if you don't have these in your store cupboard. Bump down one last time - when you empty the dough onto your work surface it should leave the bowl in one clean blob! Knead again and divide into 2 portions and place into your 2 loaf tins. Actually - here I've also created a pizza base which I'll add some yummy toppings to once its risen for the final time (we were a bit hungry).
  11. Leave to 'prove' one last time until risen. Put your oven onto 230 C and when up to heat and  your loaves have risen - slam them in!
  12. Bake for 25 minutes...remove them from their tins and bake for a further 8 minutes or until when you tap their bottoms (excuse the phrase) they sound hollow.
  13. Turn out onto a cooling tray, cover with a tea towel and allow to cool. And here we are, deep pan pizza with yummy toppings and lovely tasty loaves. The only problem is they taste sooooooo good we've eaten our way through half the loaf and scoffed the pizza already!!!


And....if you don't eat it all at once - it freezes beautifully!

Monday 23 April 2012

Cheeky Chaffinch - Twitterpated or What??

Since I started feeding the birds in our front and back garden, we have a growing number of daily visitors to the bird table and feeders in addition to our resident population of noisy sparrows who spend their day chattering and gossiping in the hedgerows.

We're also lucky enough to have regular visits from the lovely woodpecker (greater spotted) - a splash of black & white spots and bright red under belly. I finally got to snap him on film too..it's not the best photo but at least it shows he was there!


One of our other regular visitors is the Chaffinch...normaly a shy bird who flits in and out of the table and feeders without making a big fuss. However, of late he's taken to tapping at Mr F's studio window and attacking the car!

It took a while to work out what was going on here but we concluded that during sunny days when our house windows were at their most reflective, the Chaffinch was convinced that what he saw was a rival bird invading his territory. He spent days on end attacking our house windows and the car windscreen. It drove Mr F mad who was busy trying to get on with some serious artwork...in the end Mr F resorted to hanging print outs of birds of prey on his studio door. It seemed to do the trick, except that all that happened was the Chaffinch relocated to another part of the garden - in front of my window and the whole rigmarole started again!!!!


Thankfully the demented bird has stopped it's bizarre behaviour and settled back into normal feeding. Not sure if that's because it decided the reflection was not a threat after all ....or could it be because we've had duller weather of late so the 'phantom' rival Chaffinch has temporarily gone away!!!!

Tuesday 17 April 2012

Rockery Revival

It's taken a while but I've finally got to the focal point of the garden - the rockery. Another overgrown and sadly neglected part of the garden that was crying out for some TLC.

Dominated by a wierd looking water-feature that barely worked apart from glowing in the dark when switched on via the under-lawn electricity cable!

It had to go....and unfortunately it was one of those items that we couldn't recycle...so it went to landfill in Warwickshire!

Rosemary, Thyme, Lavender, Marjoram and a hint of Mint...once apon a time it was a herb garden but now overgrown and leggy plants dominate with too many dwarf conifers competing for space.

The good news is that I managed to move a couple of the conifers to another place in the garden  - bad news is that rosemary & lavender had outgrown their welcome, so they had to go -  there is a point at which even when cut back these 'leggy' plants won't regenerate successfully...so the only solution is to dig out and start again!

Still on the recycling mission I managed to find enough Cotswold stones from the garden to rebuild the rockery and create a space for new plants. Thyme, Lavender, some Irises (which should love this sunny spot), sedums and rock roses. Lots to look forward to in the summer when they start to bloom and hopefully if we can withstand the drought, a cheerful bit of colour at the centre of the garden!

Thursday 12 April 2012

Spring Time and April Showers

It's been a long wait during the winter months but Spring is definitely here at last together with some much needed April showers! Every day the hedgerows green up a little more and the Ash tree buds are just poised to burst into leaf. I've been busy planting up the borders with a variety of perennials, Skimmia Japonica, Hellebores, Foxgloves, a climbing Japonica and a lovely little plant called erythronium pagoda.

Early days yet and lots of gaps, but it's a start!


Our Tree Peony is doing really well, and having survived the winter and our pruning now has some promising looking buds on the top branches...not long now before we find out what variety it is!


Meanwhile...in the front garden a real treat....a little Clematis Alpina growing amongst the Ceanothus - delicate sprays of gorgeous blue flowers peek through the leaves and brighten up a shady corner.


Meanwhile, the apple tree is slowly coming to life too but mother thinks this one is a biennial variety which means we may not get blossom! :( Now that  would be a real disappointment.... so I'm hoping that for once mother is wrong and that we will soon have a tree in glorious bloom. The Jury is out on this one....only time will tell!

LinkWithin

Related Posts Plugin for WordPress, Blogger...